Table of Contents
When you register a domain name, one of the first critical tasks is connecting it to a web hosting service. This is where updating your domain’s name servers becomes essential. DNS Nameservers serve as a digital directory, telling the internet where to find your website and other online services associated with your domain. Without properly configured name servers, your domain won’t be able to direct users to your website or properly connect with services like email.
This guide will walk you through the process of updating your DNS nameservers with popular domain registrars such as GoDaddy, Namecheap, Dynadot, and 123 Reg. Each registrar has its own unique process, but the general principles are the same. Whether you’re pointing your domain to a new hosting provider or connecting it to an existing one, updating your DNS nameservers is a crucial step.
What Are DNS Nameservers and Why Update Them?
Nameservers translate your domain name (e.g., example.com) into the IP address where your website is hosted. Updating your nameservers is necessary when:
- You switch web hosting providers.
- You’re connecting your domain to a Content Delivery Network (CDN).
- You’re managing your DNS through a third-party provider like Cloudflare.
Failing to update your name servers correctly can result in website downtime or email service interruptions.
How to Update Your DNS Nameservers
Below are detailed instructions for updating your nameservers with some of the most popular registrars. Follow the steps for your provider to ensure everything is configured correctly.
1. GoDaddy
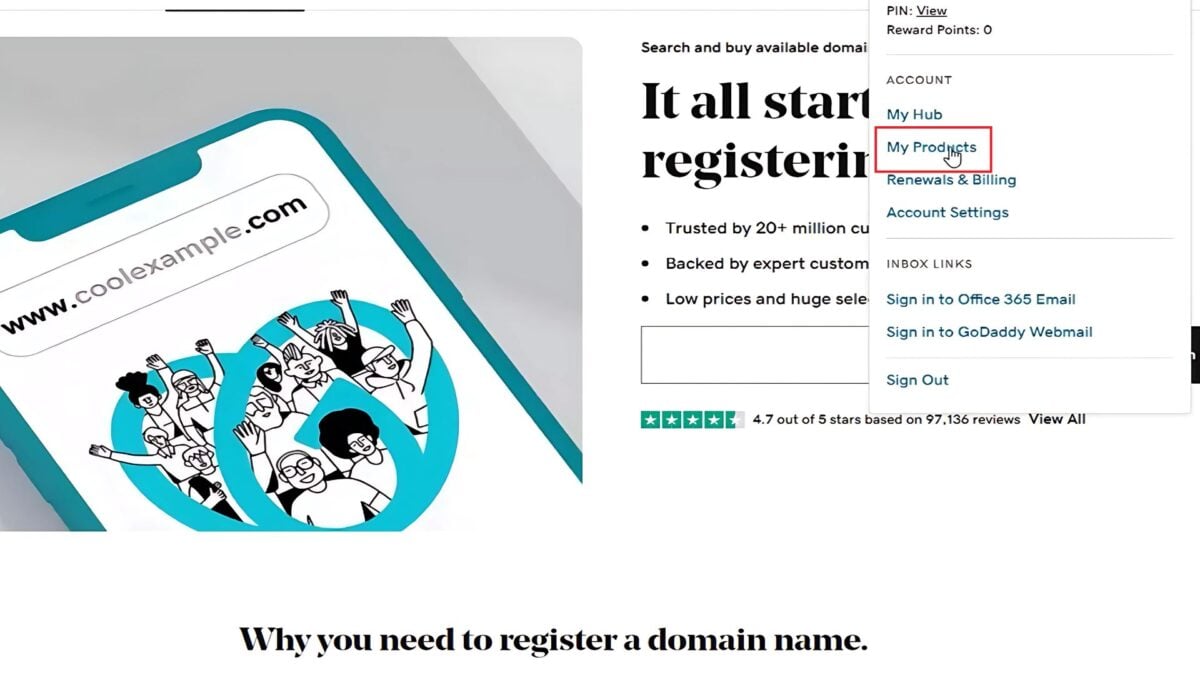
- Log in to your GoDaddy account.
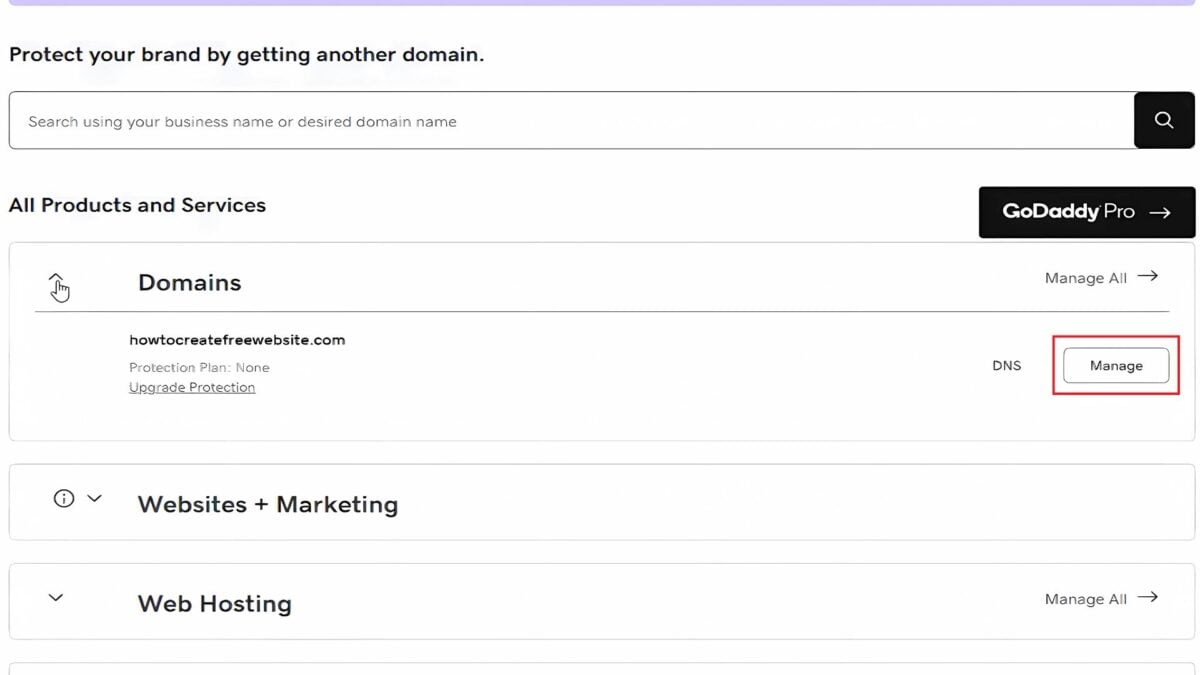
- Navigate to My Products and locate the domain you want to update.

- Click on Manage next to the domain name.

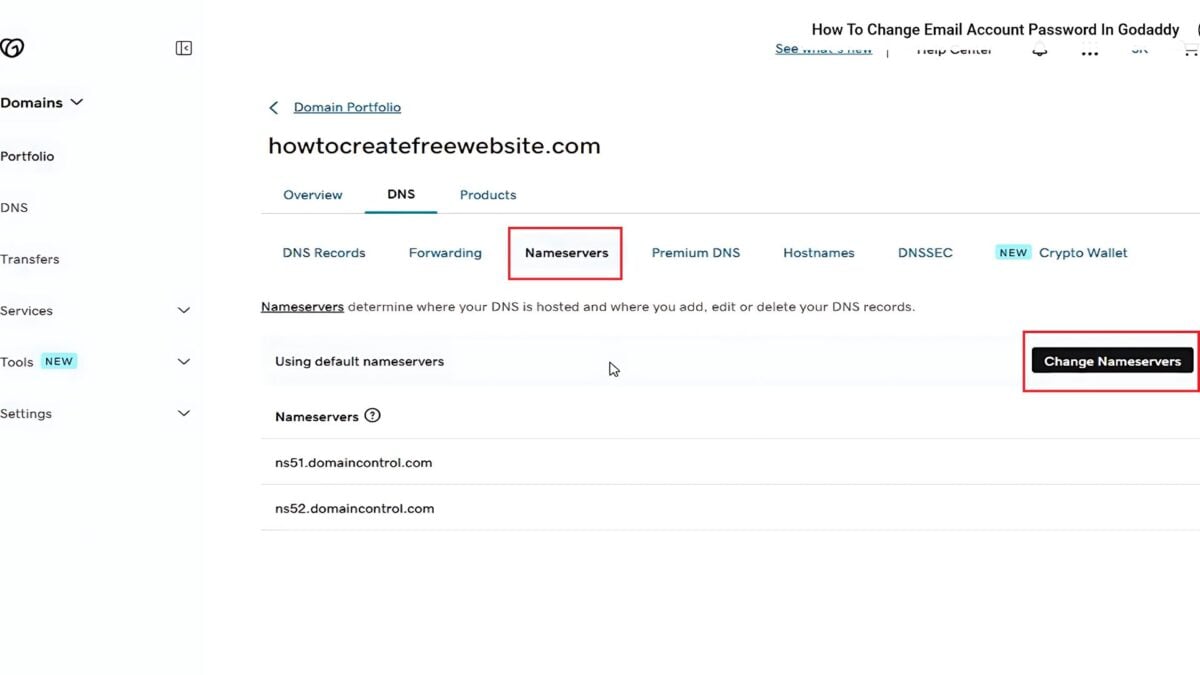
- Select the Nameservers section and click Change Nameservers.

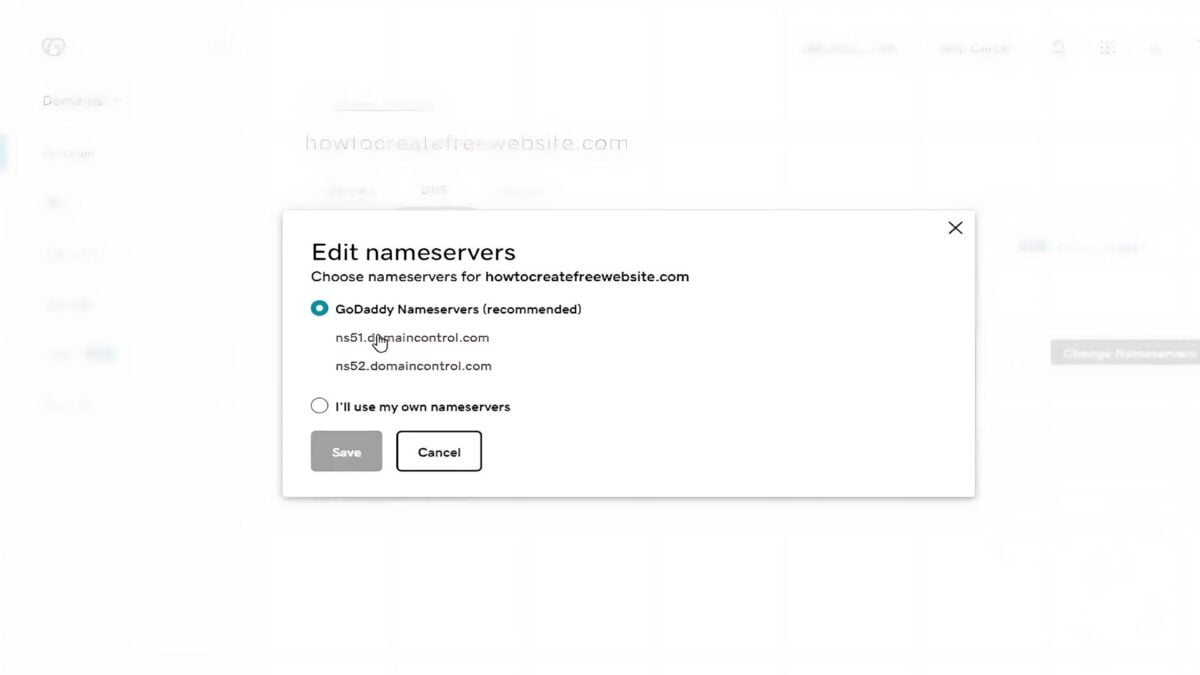
- Choose the nameserver setting that works best for you.
- GoDaddy Nameservers (recommended): GoDaddy will update your domain to a set of GoDaddy nameservers, and you’ll manage DNS in your GoDaddy account.
- I’ll use my own nameservers: Enter your custom nameservers. Your DNS will be managed elsewhere and not through your GoDaddy account.

- Select Save, then Continue to complete your updates.
- If your domain has Domain Protection, you’ll need to verify your identity. If you’ve had two-step verification (2SV) turned on for at least 24 hours, enter the code sent via SMS, or enter the code from your authenticator app. Otherwise, enter the one-time password sent to your registrant email address.
You’ll see a Success confirmation letting you know the nameservers have been updated.
Note: Most DNS updates take effect within an hour, but could take up to 48 hours to update globally.
For more details, check GoDaddy’s official guide here.
2. Namecheap
- Log in to your Namecheap account.
- Under the Domain List tab, locate your domain and click Manage.
- In the Nameservers section, select Custom DNS from the dropdown menu.
- Enter the nameservers provided by your hosting provider.
- Click the green checkmark to save your changes.
For more details, check Namecheap’s help page here.
3. Dynadot
- Sign in to your Dynadot account.
- Select My Domains from the left-side menu bar and click Manage Domains in the drop-down.
- Check the box next to your domain name(s) and click on the Action button.
- Choose DNS Settings from the Action list.
- On the DNS page, select the Name Servers setting from the top drop-down menu.
- There are two ways to set name servers:
– If you are adding new name servers, select “Enter new or existing Name Servers” from your list of choices and enter your new name servers in the provided fields.
– If you are using existing name servers, move down to the Select from your Name Servers option and choose the name servers from your existing list. - Press the Save Name Server button to save your changes.
For more details, check Dynadot’s help page here.
4. 123 Reg
- Log in to your 123 Reg account.
- From your My Products page, scroll down to the Domains section.
- From the Control Panel, select Domain Names.
- Click Manage next to the domain you want to edit.
- Select Change Nameservers and enter the new name server details provided by your host.
- Click Update Nameservers to save your changes.
For more details, check 123 Reg’s help page here.
Common Issues and Troubleshooting
- Incorrect Name Servers: Double-check the spelling and format of the name server addresses.
- Propagation Delays: Be patient; use propagation monitoring tools to verify progress.
- Loss of DNS Records: Switching name servers often disconnects existing DNS records. Ensure your new provider has the correct DNS setup.
Best Practices When Updating Name Servers
- Double-check the details: Ensure the name server addresses are entered exactly as provided by your hosting provider.
- Allow time for propagation: Changes may take up to 48 hours to take effect, during which your website may experience intermittent issues.
- Back up DNS settings: Export or document your current DNS settings before making changes.
- Monitor changes: Use tools like DNS Checker to track propagation progress globally.
Updating your DNS nameservers is a critical step in managing your website’s online presence. By following the steps provided for your specific domain registrar and adhering to best practices, you can ensure a seamless transition with minimal disruption. Remember to monitor propagation and double-check all details to avoid potential issues.
Need Help?
If you need assistance or prefer professionals to handle this for you, contact us at Pressific. Our team is ready to help you maintain a reliable and efficient online presence.
Also read,


